Monday, April 25, 2011

Double Rainbow (Cookie Stuffed) Cupcakes

So I made some rainbow chip cupcakes stuffed with goddamn rainbow chips ahoy cookies. And there you have it, Double Rainbow cupcakes. But what does it mean?
It's so intense.
I don't know. But I'm gonna eat a lot of them. Partly because they're delicious. Mostly because I made them for no occasion and now my boyfriend and I have 20+ cupcakes on our hands. Time to get down and dirty...and eat ten cupcakes.
If you would like to make these yourself, it's really quite easy. Just make up some cake batter (I used a cake mix because I'm lazy and mostly because it was 99 cents! Killer deal.) and, using a muffin tin, pour enough batter in each cup to cover the bottom then plop a cookie in there and fill it up the rest of the way. I'm definitely going to experiment with cookie/cake combinations. It's all very exciting.
But I will not be baking a pie into a cake. Because that is just dumb.

Wednesday, April 13, 2011

The Laziest/Poorest Craft Blogger in all the Land

Hey guys! Just wanted to apologize to all my loyal readers (mom) for my slacking lately. Truth is, I'm straight up living in poverty over here. Not quite, but I'm too poor to spend any money on supplies I require for certain projects. So, I've been living the craftless life as of late. Which is just the worst kind of life. I don't know how people do it. But anyways, I've got my tax return coming in anyday now and then I'm living the high life. Buying Mod Podge and shit like it don't even matter.
No, I don't know why I'm talking so tough. But whatever. You do you, and I'll do me. That's a phrase I heard used by someone really cool at the mall the other day and I'm totally in love with it. And from now on, I'mma just do me.
This whole post has gotten very aggressive and I apologize. It's 11pm on a Wednesday and I'm going wild just eating brownies and watching Top Model and I guess I got a little out of hand. I'll reel it back in for the next post which will hopefully actually be about a project I've completed. And that concludes my long-winded, unnecessary explanation as to why I have been very inactive. Have a wonderful night! Peace!

Tuesday, March 29, 2011

My (possibly over-confident) plan for the summer

Hey everybody reading this! You're great! You've come here just to read about my plan. So here it is.
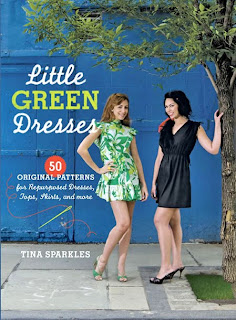
A little while ago I purchased a book called Little Green Dresses by Tina Sparkles. And I must say, it is some kind of wonderful (remind me to start using that expression way more). Basically Tina challenged herself to make all of her own clothes out of repurposed clothes and fabrics that she already had in her closet/stash or bought secondhand. I was super excited by this idea because a) I'm like real poor guys, and b) Altering clothes and refashioning things was always the most interesting part of sewing to me. One of my very first projects was a skirt made out of some old cords. And one of my favourite stores (that I have never once been able to afford an item from) Preloved, does this very thing with all of their pieces.
So, with all that said, I am setting out on this same challenge myself. My plan is to follow her rules at least until the end of the summer. The Little Green Dresses Rules are:

  • Any clothes in your closet on Day 1
  • Clothes made, altered or refashioned by you
  • Reused clothing and textiles from places like thrift stores and clothes swaps
  • New eco and ethically friendly designer items
  • Small amount of conventional items 
  • Perpetual reincarnations of all items in closet
I'm actually pretty excited about this. Especially since I'm a pretty bad clothes hoarder and have a lot of old crap to work with and make it into lovely new crap. I also just raided my boyfriends stash of old crap today. For some reason, I kind of want to hang onto his old Blue Jays t-shirt. Don't ask me why. It's a pretty heinous t-shirt.

Sunday, March 20, 2011

"$40? Don't buy that! I will make it for you myself! I promise!" - Mary McDonald making a promise she has no intention of keeping

Really? An elastic waistband, UO?
It's like you're not even trying.
 The above quote is something I say on most shopping trips I go on. I pretty much never follow through on this promise because a.) I usually forget that I promised you anything immediately after promising it/don't want to make you anything and pretend to forget the promise and b.) I am usually exaggerating the truth and could not, in fact, make that item myself. But once in a while, I follow through on this promise. Only when I make the promise to myself, and only when the item in question comes from Urban Outfitters. A company that knows that really cool people love the idea of second hand a lot more than they love digging through smelly racks of second hand clothing. They capitalize on this by creating their "Urban Renewal" pieces. And by "Urban Renewal" they mean, "Let's buy a bunch of shitty old clothes for cheap, wash the stink out of them, gussy 'em up a bit and sell them for a %600 profit." It's genious. It really is. But I actually own a sewing machine, UO. And I can recreate most things you sell in a few hours.
So I took this skirt, which would have cost me $40 and made it for $3. Literally $3.
It wasn't even hard. If you have a basic knowledge of sewing and own a sewing machine, you can easily whip one of these off in an afternoon.
You just take a large or XL men's shirt, depending on your size and how full of a skirt you want. I used an XL shirt and I ended up with a pretty full skirt. 
Then you cut straight across the shirt from armpit to armpit (you may have to remove pockets). The bottom part will be the skirt.
Use some of the rest of the shirt to make a waistband and sew one of the existing buttons and buttonholes to the waistband so you don't have to make a new buttonhole (it truly is the worst part of sewing).
Then, gather the skirt as much as you need to and sew it to the waistband and you are done!
Cheapest skirt I have ever owned. The best.

Saturday, March 5, 2011

Mug Cake! Cake in a mug!

So, it's Saturday night and I'm having one heluva time. I made mug cake. Basically you put the ingredients in a mug and microwave it. Incredible! Here's how!


So, you put the dry ingredients in the mug first (a big mug) and mix it up. Then add the wet and mix it up and then add the chocolate chips if you're adding them. I recommend adding them though unless you have icing as well because the cake could be a little dry without them. After that you just pop it in the microwave on high for 3 minutes and you have cake. Just like that.
I couldn't even believe my eyes. Cake! In a mug!

Wednesday, January 26, 2011

Seemed like a great idea at the time...

So, this is a craft I did, oh, 13 years ago. My mom found it and thought I should post pictures of my handiwork. So here it is, Mary's Wheel of Fortune.

So basically you just gave this bad boy a spin and then found out what kind of day you would have. Those days included: a bad day, a good day, a good hair day, you'll get a compliment, you'll get in trouble, you'll win a contest and, everyone's favourite, you'll go to the hospital. 9-year-old Mary had no problem getting real apparently. My dad's a carpenter so there was always scrap wood lying around when I was a kid. So I just found this round piece and loosely nailed it to another piece and then went to town with the glitter glue and markers. Absolutely my best work to date.

Thursday, January 20, 2011

My Mom's Old Activist T-shirt

I found this in my mom's closet one day. She said it was one of her t-shirts from her protesting days in the 80s. I'm pretty sure I started wearing this in an attempt to look a lot cooler than I actually was. I think that was around the same time that my brother and I insisted on going shopping at Value Village and bought a bunch of old t-shirts that we never actually wore. Good phase, that one. Anyways, all of that ended in me making this lovely wall piece.
The t-shirt is actually still intact. I could take it off and wear it again if I really wanted to. All I did was just stretch it over a canvas and tuck all the edges between the wooden frame and canvas. Pretty simple project and an easy, interesting way to decorate your place.